Kiwire 3.0 Administrator - Device & Controller Setup Guide
Kiwire 3.0 Administrator - Device & Controller Setup Guide
Cambium Networks Configuration for Kiwire Hotspot
Cambium Networks Configuration for Kiwire Hotspot
Prerequisites
Before integrating the controller with Kiwire, it is necessary that the controller and access point:
-
are connected to the Internet
-
are reachable on the network
-
have an IP address assigned to the a through DHCP or static
Note:
-
Kiwire-hostname or Kiwire-ip can be obtain by contacting our technical support for our cloud customer. For enterprise client the ip will be on premises Kiwire ip address.
-
Social network hostname list can be obtained from Social network whitelist guide
Part 1: Cambium cnMaestro configuration
-
Login to your Cambium cnMaestro controller
-
Go to WLANs > Configuration > AAA Servers
-
Authentication Server
-
Host: Kiwire-hostname or Kiwire-Ip
-
Secret: create a secret pass phrase
-
Port: 1812
-
Timeout: 3 seconds
-
Attempts: 1
-
-
Accounting Server
-
Host: Kiwire-hostname or Kiwire-ip
-
Secret: secret same as authentication server
-
Port: 1813
-
Timeout: 3 seconds
-
Attempts: 1
-
Accounting Mode: Start-Interim-Stop
-
Accounting Packet: ticked
-
Interim Update Interval: 1800 seconds
-
-
Advanced Settings
-
NAS-Identifier: AP MAC address with capital letters and colon
-
Dynamic Authorization: ticked
-
Dynamic VLAN: ticked
-
Called Station ID: AP-MAC:SSID
-
-
Omaya 3.0 Administrator > Quick Setup > Dashboard
Documentation
Kiwire 3.0 Administrator - Device & Controller Setup Guide
Mikrotik Configuration for Kiwire v3 hotspot
Prerequisites
Before integrating the controller with Kiwire, it is necessary that you upgrade the Mikrotik to latest stable firmware. Mikrotik lastest firmware can be downloaded from https://mikrotik.com/download
Note:
-
Kiwire-hostname or Kiwire-ip can be obtain by contacting our technical support for our cloud customer. For enterprise client the ip will be on premises Kiwire ip address.
-
Social network hostname list can be obtained from Social network whitelist guide
-
Create Hotspot
a). Go to IP > Hotspot,
b). click on the Servers tab and click Hotspot Setup to follow the wizard


c. Select which HotSpot Interface network should be running
d. Create network segment for the hotspot network

e). Set DHCP pool for hotspot users

f). Select “none” for certificate unless you have a valid SSL certificate installed in Mikrotik

g). Set 0.0.0.0 for SMTP server since we are not going to use this for Kiwire

h). Set DNS servers

i). Set DNS name to hide the hotspot gateway IP or can leave it blank

j). Set a dns name for the hotspot, the dns name is only known and valid to guest within your hotspot network
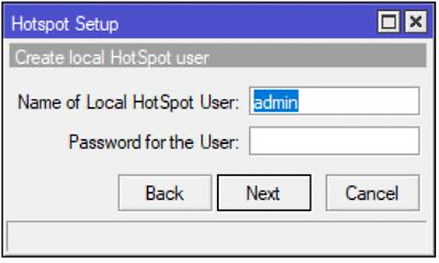
k). Ignore local hotspot user since we are using Kiwire. Proceed with next step
l). You have completed the initial setup
m). Go IP > Hotspot > Server Profiles,
n). Double click on the hotspot server created and go to Login Tab and tick login by HTTP PAP

o). Go to RADIUS tab and tick USE RADIUS

p). Go to IP > Hotspot > User Profiles and double click on the default list and under General tab change the Shared Users to the amount of the hotspot users.

q). Go to Walled Garden IP List and add 2 new rules for source and destination address which is Kiwire IP, if you wish to activate Social login refer to network wallgarden guide to add respective wallgarden list

r). Go to RADIUS.
s). Add new RADIUS and set Kiwire IP and secret key (must matched with Kiwire setting later).
t).Click on Incoming and tick Accept and use Port 3799 as COA port

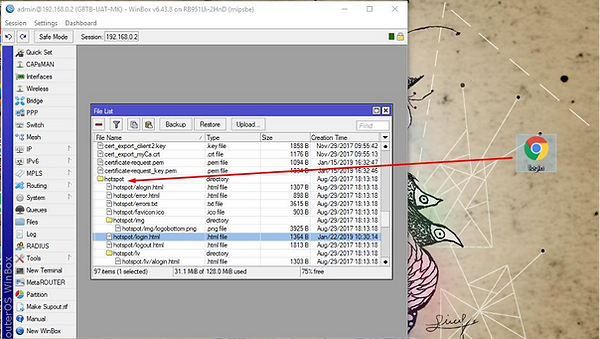
u). Use below login.html and change the url to:
https://<kiwire-ip/login/mikrotik

v). Drag the login.html file to Hotspot folder under Files below log
w). Go to System > Identity and set a unique name for Mikrotik and this will be used later in Kiwire setting.

Success! The Mikrotik hotspot network is now pointed to Kiwire.
Kiwire Configuration for Mikrotik
-
Adding NAS into Kiwire
-
Navigate to Devices > Devices > Add Device
-
Device Type → Controller
-
Vendor → Mikrotik
-
Identity → The Nas ID you set earlier
-
Ip Address → Mikrotik device ip address
-
Address → optional
-
Username → Mikrotik username
-
Password → Mikrotik password
-
Shared Secret Key → Secret key phrase set at Radius
-
COA Port → 3799
-
Description → optional
-
Monitoring Method → optional
-
Community → optional
-
Snmp version → optional
-
Create→ to save
-
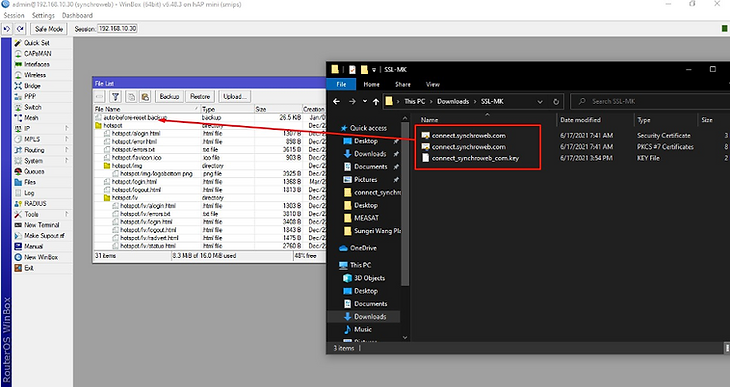
SSL Certificate Mikrotik Hotspot
1. Copy this 3 file paste into Files (Mikrotik)
2. Go to System → Certificate

3. Import this following items:
i). 1st inport file.crt
ii). 2nd import file.key
iii). Status will be “KT”


4. Go to IP -> Service → Enable www-ssl → Select Certificate

5. IP → DNS → Static-> add → Name “cert DNS register name”

6. Go to IP → Hotspot → Server Profile → Select Server Profile Use → General → add DNS Name

7. Login Tab → Enable HTTPS → Select SSL Certificate → Enable HTTPS Redirect
