Device & Controller Setup Guide - Mikrotik Device Configuration for Kiwire
- synchrowebmarketing
- Oct 22, 2020
- 2 min read
A. MikroTik Configuration
Step 1 – Go to IP-Hotspot, click on the Servers tab and click Hotspot Setup to follow the wizard.

Step 2 – Select which HotSpot Interface network should be running.

Step 3 – Create network segment for the hotspot network

Step 4 – Set DHCP pool for hotspot users.

Step 5 – Select “none” for certificate unless you have a valid SSL certificate installed in Mikrotik.

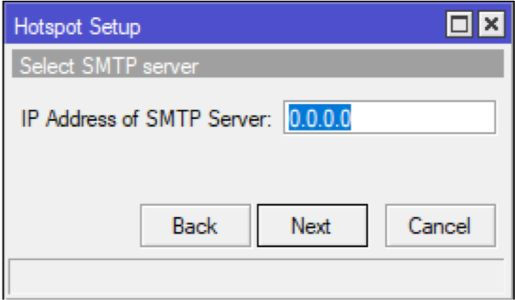
Step 6 – Set 0.0.0.0 for SMTP server since we are not going to use this for Kiwire.
Step 7 – Set DNS servers.

Step 8 – Set DNS name to hide the hotspot gateway IP or can leave it blank.

Step 9 – Ignore local hotspot user since we are using Kiwire. Proceed with next step.

Step 10 – Go to Server Profiles, double click on the hotspot server created and go to Login tab and tick Login By HTTP PAP.

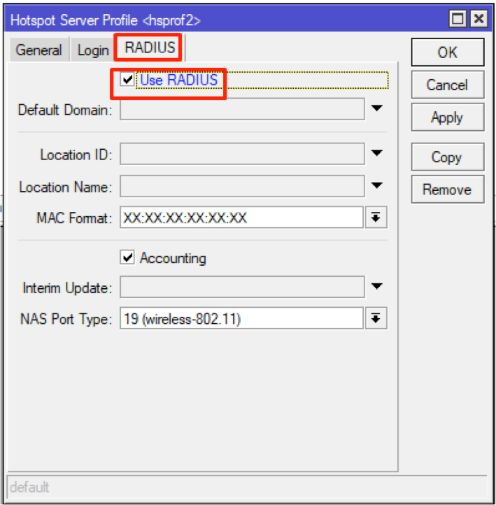
Step 11 – Go to RADIUS tab and tick Use RADIUS.
Step 12 – Go to User Profiles and double click on the default list and under General tab change the Shared Users to the amount of the hotspot users.

Step 13 – Go to Walled Garden IP List and add 2 new rules for source and destination address which is Kiwire IP.

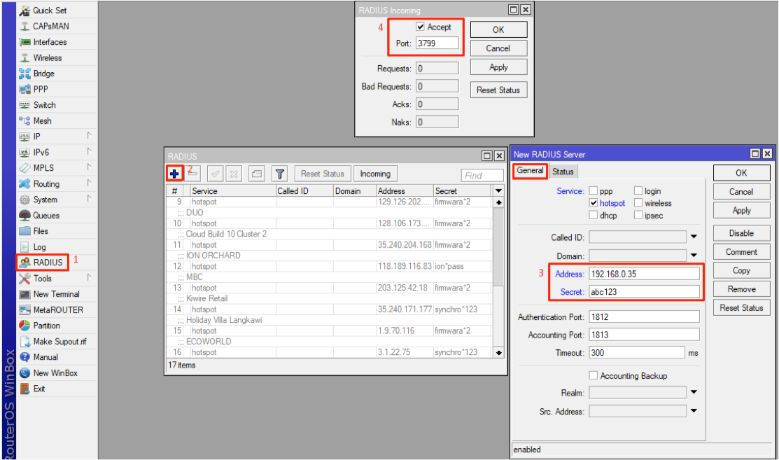
Step 14 – Go to RADIUS to point Mikrotik to Kiwire.
Add new RADIUS and set Kiwire IP and secret key (must match with Kiwire setting later)
Click on Incoming and tick Accept and use Port 3799 as COA port
Step 15 – Download and save this page using mouse right click + “save as”
Edit the downloaded login.html with any html text editor (i.e notepad++ etc)
Change the URL as shown below

Step 16 – Drag the login.html file to Hotspot folder under Files.

Step 17 – Go to System > Identity and set a unique name for Mikrotik and this will be used later in Kiwire setting.

Step 18 – Success! The Mikrotik hotspot network is now pointed to Kiwire.
B. Kiwire Configuration
Step 1 – You can now proceed to add the Mikrotik into Kiwire NAS.
Login to Kiwire web panel and go to Devices > NAS and click Add NAS
Step 2 – Add a new NAS.
Go to Device > NAS
Set Device Type to Mikrotik in the dropdown option
Set NAS Identifier to mikrotik in the input field
Set IP Address to the Access Point (AP) IP
Set Shared Secret Key to the same key as Mikrotik RADIUS profile
Set COA Port to 3799


Step 3 – Configuration is now complete
Step by Step Video Tutorial
https://youtu.be/x9HiDExNNT4https://youtu.be/BYPPdZAvQmo
Comments